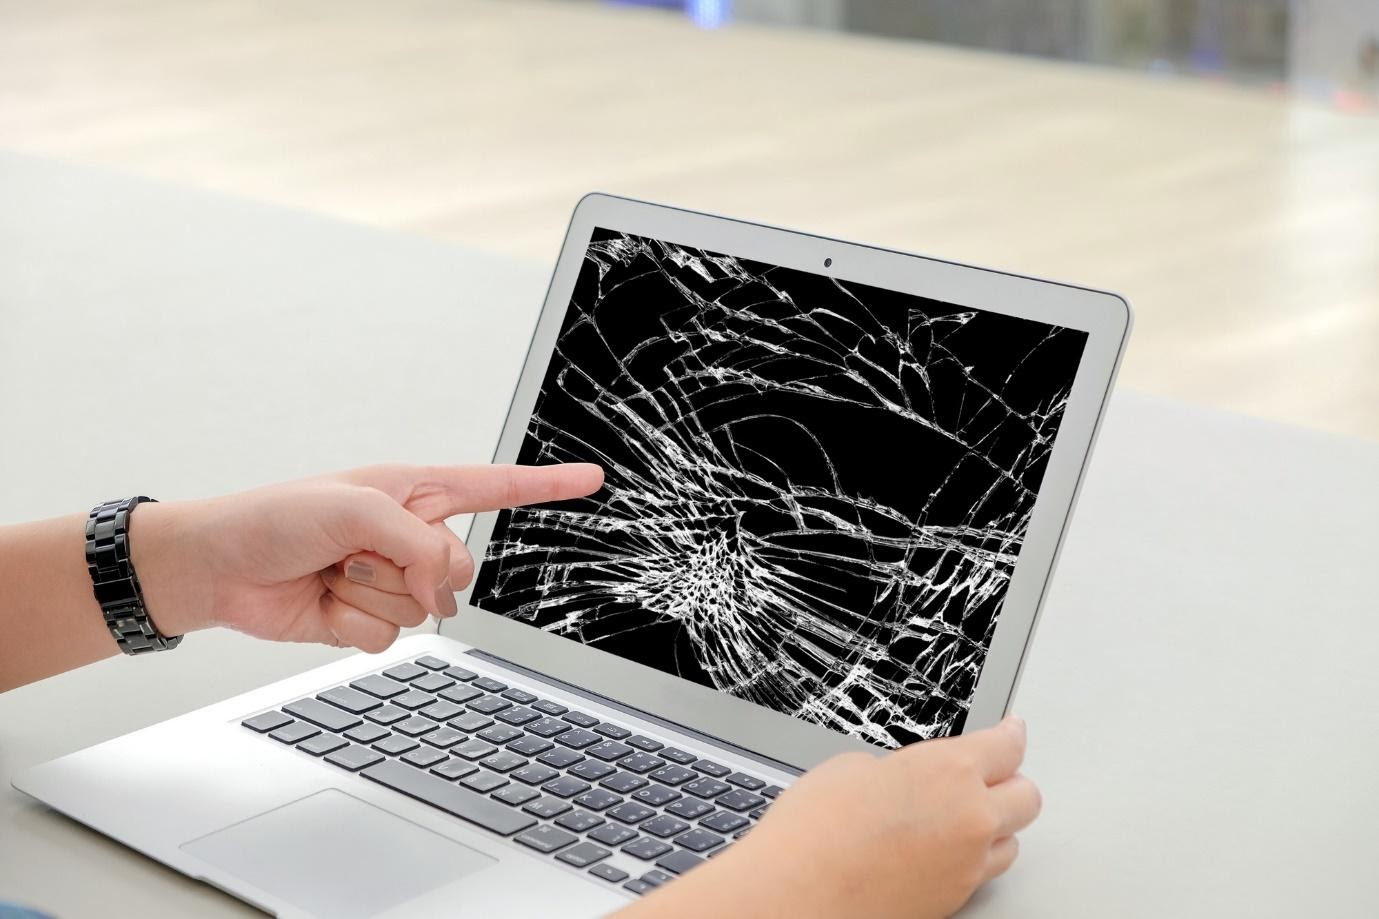
Are you struggling with a broken laptop screen?
In the age of modernization, working with a laptop is extremely common. Over 36% of Americans own a smartphone, laptop, and tablet. Plus, many people bring their personal devices to work.
Due to the pandemic, working from home became the new format. Dealing with damages to your laptop can impact your productivity and be a stressful ordeal.
Don’t worry—we got you.
Assess the situation and determine whether to repair or replace laptop screens. This guide will help you ascertain if it’s worth repairing. Read on and find out more.
Check Whether Something Else Is Wrong
In most cases, laptop screens break because people dropped them. The worst part is that it’s likely for other components to break when this happens.
To determine whether it’s worth repairing or replacing, think about the following problems.
Cracked Case
After removing the screen, you’ll likely see other cracked parts. When this happens, you may need to replace both screen and case.
Cable Tears
Always remember that laptop components are delicate. When you drop it, the impact will damage these. Often, the damaged plastic within the laptop will tear through the cable.
Cracked Components
If the screen cracks after the drop, the force is enough to crack other laptop components. This will make things more complicated. Depending on the damaged components, the repair or replacement can get expensive.
Hard Drive
Most computer repair businesses report around 50% of laptops with cracked screens have damaged hard drives. If you have a broken laptop screen from dropping it, you may need to look into getting a new hard drive.
As these underlying problems pile up, the repair costs will increase. If your laptop sustains all these damages, it’s better to replace the entire laptop instead.
See Whether the Screen Components Are Hard to Find
Your decision to replace or repair your laptop screen depends on your location and model. For example, if your laptop is an older model, it can be harder to look for extra components. Sure, you can look online for used parts, but this is risky.
Most of the time, you’ll get overused or counterfeit components. It will make the entire process more complex than necessary. This applies even when you ask professionals to repair or replace your broken screen.
Laptops with rarer components mean you may need to wait for a long time before you get them. This is especially true when you have no means of getting parts on your own. This will waste your time, as well as your repair professional’s.
Look at the Laptop’s Warranty
If your laptop is under a year old, it’s likely still under warranty. This means you can opt to get the manufacturer to repair your broken screen. Most will require you to do this since they’ll void the warranty otherwise.
The good news is that this means you’ll likely get every broken component repaired. This is great because of the sheer number of things that can go wrong.
Take note, after the warranty expires, you must think about the cost of repairs. In most cases, you must opt for a laptop replacement if the repair cost goes beyond 50% of the replacement price. This is a general rule if your laptop is two years old.
How to Fix a Broken Laptop Screen
Now you know whether to repair or replace a broken screen, it’s time to learn how to repair it. If your laptop no longer has a warranty, doing it yourself is your cheapest option. The best part is that repairing the screen is easy, as long as it isn’t a touch screen.
Here are some steps you can do.
1. Know Your Laptop Model and Look at the Damage
Before fixing your screen, know what you must repair. This means the type of device you possess influences the replacement parts’ price. Always do your research and find out the cost of fixing your specific laptop model.
After that, follow these steps:
Power the Laptop
Ensure that your device will boot up. This determines whether you need only fix your broken screen. Attach your laptop to a separate monitor and power it up.
If your laptop works with no problems, then you can breathe a sigh of relief. Take note: you’ll need to press some function keys to make the external display work. This depends on your current laptop model.
Inspect the Rest of the Laptop
Do a complete inspection of your laptop. You might find other malfunctioning components, as discussed above. Again, if you find more damaged parts, you might end up replacing the entire laptop instead.
If you want a better replacement, why not check one of these Lenovo laptops? These are great without breaking your budget.
2. Look for the Correct Screen
The reason you must know your laptop’s model is to ensure you buy the correct replacement screen. Lots of manufacturers offer screen repair kits. This makes the process easier, but ordering the wrong screen will make them useless.
Is it difficult to figure out your laptop model? If so, look at the “Settings” menu. Here you’ll find your laptop’s serial number that helps your search.
The good news is that finding the right screen isn’t as stressful. You’ll likely find one as long as you enter your laptop’s model number online. Most of the time, you’ll find laptop screens at reasonable prices.
Some sellers will use other identifying terms for your laptop model. That’s why you must pick the right option before buying. It’s almost impossible to pick the wrong one because online sellers display all necessary information on the listing.
Regardless, take the time to compare your laptop’s specifications. Ensure that the video cable behind your screen will match the one you’re viewing.
3. Get the Right Tools to Open the Screen
You must gather some tools to install a replacement screen. Here are the tools you need to simplify the process:
- Clean, flat work surface
- Putty knife
- Phillips screwdriver
- Pin or needle
- Small dish
- Adhesive or tape
Again, certain laptop models come with repair kits. Research your laptop type and determine their availability. Only get these tools if you have no specific repair kits.
Once prepared, you can now start the laptop screen repair. Follow these steps.
Unplug Power Sources
Turn the laptop power and unplug it from any power source. This removes the risk of getting an electric shock. Remove the battery as well to prevent other issues.
Identify the stickers that cover the screen bezel’s screws. In most cases, you’ll see them near the bottom screen. It’s usually where the hinges are, and they come in twos.
Remove Stickers and Screws
Use the pin to remove the stickers. This makes them reusable after installing the screen. Put them in a safe spot to ensure they’re ready.
After that, remove the visible screws using a screwdriver. Put them on the small dish to ensure you won’t lose them.
Remove Bezel
Do this carefully because you’ll reinstall it after the replacement. Use a putty knife or another flat object to do this. Don’t worry about the plastic snapping sound since it’s the plastic tabs unfastening.
4. Remove the Screen
This is the trickiest part of repairing your laptop screen. Loosen all the screws before lifting the screen away from the metal frame. Some screws also secure the screen on the sides, so unscrew them before removing it.
After that, your screen can now lie on your keyboard. It’s challenging to put enough space between it and the metal frame. Be gentle if you don’t want to destroy the video cable running from the screen’s back to the laptop body.
Disconnect the cable from its central connectors. In some cases, you’ll find it at the bottom of the screen. You must pry it if the cable has adhesive connecting them.
5. Insert the New Screen
After removing the broken screen, you’ll know where the new one goes. Put it face down within the frame since this is a perfect fit. After that, reattach the video connector where the previous screen sat.
Ensure that you align them well. After that, use tape or adhesive to secure it. Once you secure the sides, you can reinsert the screws and put the bezel on.
Line up the bezel until it snaps into the screen case. After snapping everything into place, reinsert the screws into the bezel. Finish it off by reattaching the screw covers.
Put the battery in and plug your laptop. Test whether it works to determine your success.
Fix Your Broken Laptop Screen Today
Are you having a hard time with a broken laptop screen? Those are some things to consider before deciding to repair or replace laptop screens.
Do you use your laptop for work? Check out our other guides for the best tech enhancements guides for productivity!


 with Data Analytics")


